Not food!

So I realise my posts are kinda sterile in that I don’t give much opinion but I figured I could have some courage in the form of digital text.  I’m not posting as much in terms of recipes as I don’t have as much time and light as I did – but still love trying new things.  I shall be making a non food section.   ‘Talk’.  I found out that what I expected of my parents….the usual fish ‘n’ chip/ steak pie ensemble –  they took a gamble, the atypical Scots, on Arabic soil and I thought the shit would fly.  The opposite happened.  They came back loving it, they came back wanting more.  More culture, more this, more that.  It’s amazing.  It’s inspiring. The more they went back, and it was multiple the times –  (they’ve been about 4 times) I had more respect for them.  I had this opinion about them that I feel they changed by  doing something they never said they would do and I’m really proud and happy they did.  They tried this food, they tried that food.  May not be a big thing for most but for them……HUGE.  Never in a million years thought my mother would say, “I loved the Thai food”.  Some context there is that my parents would never have even tried anything other than the typical Brit fair.  So happy they tried something new and liked it!  I can now groom them to enjoy something hot!

Tom yum?  No that’ll blow their minds.

Here’s to trying something new!

Slainte mhath

Gyudon – Beef Rice Bowl

Beef Donburi Serves 2

INGREDIENTS
Meat
200g Thin Beef Slices

Broth
1/2 Onion – thin wedges
100ml Warm Water
Pinch Dashi Granules
1 TBSP Sake
1 TBSP Mirin
2 TBSP Soy Sauce
1 TBSP Brown Sugar
1 Thumb Ginger – grated

Toppings
2 Eggs – Soft Boiled or Onsen Eggs
100g Spring Onions
Small amount of Beni Shoga
Sprinkle of Shichimi

INSTRUCTIONS

1. Par boil the beef slices in just boiling water for a few minutes till the pink has gone and drain well.

2. Add sugar, sake, soy and mirin to a pan and let it bubble till sugar has dissolved.

3. Add beef to the pan and coat with broth for a few minutes – remove beef leaving the broth in the pan and set aside.

4. Add onions, water, dashi and ginger to pan and coat. Cover with lid and let bubble for 5 minutes on medium heat.

5. Add beef back to pan and stir.

6. Serve beef and broth on top of steamed rice.

7. Top with onsen or soft boiled egg, chopped spring onions, shichimi and beni shoga (I didn’t have any left so cheated with gari).

Source: Cooking With Dog.

Gyudon Donburii – Anonymous Cookery – 2015

Tsukemen

Serves 2

INGREDIENTS
Meat
100g Pork Belly Slices
1 Thumb Ginger Root – Lightly Crushed
Pinch Red Chilli rings (or chilli flakes) – add more if you like it hot.
1 Clove Garlic – Lightly Crushed
1 Jumbo Spring Onion – Green Part

Broth
400ml Chinese Style Chicken Broth (1/2 TBSP granules to 400ml water)
2 TBSP Sake
1 White part Spring Onion (Jumbo, cut diagonally)
2 TBSP Soy Sauce
40g Shiitake Mushrooms
40g Shimeji Mushrooms
1 TSP Vinegar
1/2 TSP Sesame Oil

Toppings
2 Eggs – Soft Boiled
Handful of spring onion leaves
Dollop of Grated Garlic

2 Bags of Ramen Noodles

INSTRUCTIONS

1. Stir fry the pork slices in a pan until they release some fat and stir in the chillis.

2. After stir frying for a few minutes add in the sake and stock along with the green part of the spring onion, garlic and ginger – bring to the boil. Skim off any foam to clarify the broth.

3. Once boiling lower to a simmer for 10 mintutes.

4. This is good time to boil your egg. I boil mine for 6 minutes if they are room temp to start. I over cooked in this one, oops.

5. Remove the green spring onion leaves, ginger and garlic and add the soy and white part of spring onion, continue to simmer.

6. Once the white spring onion has wilted taste the broth and add pepper to taste.

7. Add in sesame oil and vinegar.

8. Boil your ramen as per instructions, mine only takes 3 minutes, rinse in cold water to remove the goo and squeeze out any water without crushing it. Place on a bamboo mat to drain.

9. Serve the tsukemen in a small bowl next to your ramen noodles and egg.

10. Garnish with chopped spring onion leaves, grated garlic, bonito flakes or chilli oil.

Source: Cooking With Dog.

Tsukemen - Anonymous Cookery 2015
Tsukemen – Anonymous Cookery 2015

Kakuni

Serves 2

INGREDIENTS
Meat
500g Pork Belly
30g Ginger Root
1 Jumbo Spring Onion – Green Part

Broth
100 ml Sake
450ml Warm Water
1 Piece of 5cm x 5cm Kombu
2 TBSP Brown Sugar
2 1/2 Soy Sauce
1 TBSP Hon Mirin

Toppings
2 Eggs – Soft Boiled
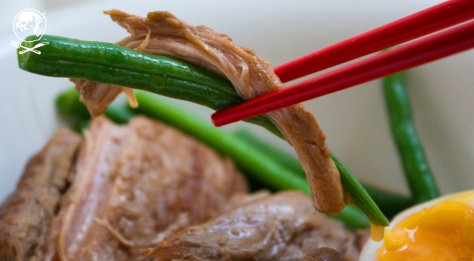
100g Green Beans
1 Dollop of Karashi

INSTRUCTIONS

1. Fry all sides of pork belly in a non-stick pan till golden brown.

2. Remove from pot and place in clean pot or slow cooker.

3. Add half the ginger and green part of the jumbo spring onion and cover with warm water.

4. Simmer or slow cook for at least 2 – 3 hours. 8 hours is best.

5. Remove pork from slow cooker and rinse of any fat and pat dry with paper towel.

6. Put on rice if using.

7. Replace pork back into a small clean pot and add sake, warm water and kombu.

8. On medium heat bring to a simmer and use drop lid to keep meat under the water for 20 minutes.

Eggs

1. Place room temp eggs in a pot of water of boiling water, boil for 6 minutes and let cool in cold water then peel.

2. Add 1/3 of sugar and soy to pot and stir. Replace drop lid and let boil down for a few minutes.

3. Repeat previous process, 1/3 sugar and soy.

4. Add remaining soy and sugar.

5. Add mirin and gently spoon over the pork.

6. Move the pork asside in pot and add in the eggs to soak some broth.

7. Boil green beans for 6 minutes.

8. Place the pork in serving dish and place the drained green beans in the broth to warm through.

9. Cut eggs in half and place on serving dish.

10. Place green beans next to pork and pour broth over the meat.

11. Garnish with karashi (Japanese mustard) and the shredded white part of the spring onion.

Source: Cooking With Dog.

Kakuni - Anonmous Cookery 2014
Kakuni – Anonmous Cookery 2014
Kakuni - Anonmous Cookery 2014
Kakuni – Anonmous Cookery 2014
Kakuni - Anonmous Cookery 2014
Kakuni – Anonmous Cookery 2014

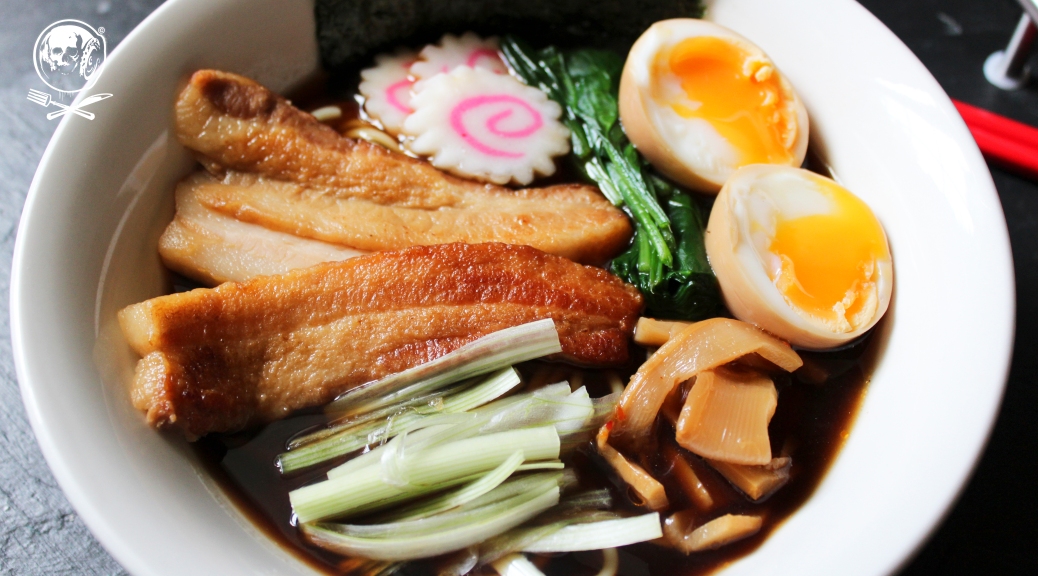
Yakibuta Ramen

Serves 2

INGREDIENTS
Meat
500g Pork Belly
1 thumb of Ginger
4 TBSP Soy Sauce
2 TBSP Sake
1 TBSP Brown Sugar
Green part of jumbo Spring Onion

Eggs and seasonings
2 Eggs
1 TBSP Soy Sauce
1 TBSP Sake
1 TBSP Hon Mirin

Toppings
White part of Jumbo Spring Onion
4 Slices Naruto Maki
50g Menma
1/2 Toasted Nori Sheet
50g Spinach

Noodles and Broth
200ml Dashi Stock
2 bags Fresh Ramen
2 TSP Chicken Broth Granules (Chinese Style)

INSTRUCTIONS
1. Soft boil the eggs and warm up the egg seasonings in microwave in a bag.  Around 30 seconds but be careful if your bags aren’t microwavable, they could melt.

2. Put peeled soft boiled eggs into the bag and seal closed. Marinate these eggs either over night in fridge or a few hours at room temp.

3. Fry Pork Belly in non stick pan on all sides till golden. Remove any excess fat with kitchen paper.

4. Add in the bruised ginger piece and green part of jumbo spring onion, and top with water to cover. Place a drop-lid or bowl over the meat to keep it submerged.

5. Bring to a simmer and lower heat to lowest for 2 hours.

6. Prepare the toppings for the ramen during this time.

7. Remove the pork from the water and dry off with kitchen paper. Place it in a clean bowl and cover with clingfilm. Set aside.

8. Using 1/2 of the cooking water add the soy, sake and brown sugar. And add to a clean pot.

9. Add the dashi to the pot and reduce the total volume to about 1 cup.

10. Place the pork back into the pot with the broth and bring to a simmer. Once simmer turn off the heat and leave to cool so you can handle the pork with your hands.

11. Once cooled, cut the pork belly into thick slices.

12. Boil the spinach for about 30 seconds in water then remove and squeeze out water and add ramen noodles as per the instructions on package, usually around 3 minutes.

13. Slice the eggs in half.

14. Optionally you can grill the pork slices to crisp up the outer layers.

15. Place the chicken stock powder/granules in the bottom of the serving dish and place the rinsed and rubbed ramen noodles over it.

16. Pour over the broth and loosen the noodles.

17. Place the pork slices, the menma, finely sliced spring onions, spinach and Naruto Maki on top of the noodles.

18. Garnish with the nori sheet on side of dish half dipped in the broth.

NOTES
This takes a while but I love the soy, mirin, sugar taste. Kakuni is very similar in terms of sauce.  I add a little more soy and less dashi to mine as I prefer it that way so the broth is darker than usual.  I would keep to the amounts shown if unsure.

Yakibuta Ramen - Anonymous Cookery 2014
Yakibuta Ramen – Anonymous Cookery 2014
Yakibuta Ramen - Anonymous Cookery 2014
Yakibuta Ramen – Anonymous Cookery 2014

Source: Cooking With Dog.

Chilli Con Carne

Serves 2

INGREDIENTS
500g Minced Beef
400g Canned Tomatoes
410g Can of Chilli Bean/Kidney Beans
1 Large Onion – Finely chopped
1 Red Pepper – chopped
2 Garlic Cloves – Crushed
1 Chicken Stock Cube
1 TSP Hot Chilli Powder
1 TSP Paprika
1 TSP Ground Cumin
1/2 TSP dry Marjoram
1 TBSP Oil
1 TSP Sugar – Substitute for 1 cube of chocolate if preferred
1 TBSP Tomato Puree

INSTRUCTIONS
1. Fry onions at medium heat till soft, approx 5 mins.

2. Add in garlic, red pepper, chilli powder, paprika and cumin. Stir and leave for 5 mins.

3. Turn up heat and add mince to brown.

4. Crumble in stock cube to 300ml hot water and add to pan with the tomatoes, marjoram and sugar/chocolate.

5. Season with salt and pepper and the tomato puree and bring to boil, once boiling, turn down heat and cover with a lid.

6. Simmer for 20mins.

7. Keep an eye on the pan to check for drying, add water if beginning to burn.

8. Drain and rinse beans and add to the pot.

9. Bring to boil without the lid for 10 minutes, taste and season again.

10. Turn off heat and leave to sit for at least 10 mins before serving.

NOTES
Chilli is best the next day so try keep some for laters! Great served with steamed rice or with cheesy nachos.

Potato Salad – Japanese Style

INGREDIENTS
200g Potatoes – bite-size chunks
50g Carrots – 5mm half moons
70g Cucumber – thinly sliced
30g Ham – 1cm strips
50g Onions – finely cut strips
1 Boiled Egg – cubed

Seasonings
1/2 TSP Rice Vinegar
2 TBSP Mayo
1/4 TSP Salt – less if using ham
1 Pinch Pepper
2 Pinches Sugar

INSTRUCTIONS
1. Simmer potatoes and carrots on medium heat till soft. Drain and shake to fluff up the potatoes.

2. In a big bowl add potatoes and carrots.

3. Add the salt, sugar, vinegar and pepper. Toss to coat and leave to cool.

4. Rubs salt into onion slices and rinse with water. Dry off with paper towel and add to the potatoes.

5. Add mayo, ham, cucumber, egg, and pepper to taste. Toss to coat.

NOTES
This goes well for a bento side dish.

Beef Stew

Serves 2

INGREDIENTS
280g Beef Cubes
60g Red Wine
Salt and Pepper

100g Carrots – Chunky
100g Onions – Cut Thick
30g Garden Peas
30g Parsnip – Thick Strips
1 TBSP Plain Flour
1 TBSP Butter
1/2 Clove Garlic – Minced
1 TBSP Tomato Puree
1 Bouquet Garni
600ml Beef Stock

INSTRUCTIONS
1. Marinade beef in the red wine and a pinch and salt and pepper for at least 30 minutes.

2. Once marinaded, dry off the beef with kitchen paper and dredge in flour. Keep the red wine for later.

3. Heat oil and butter in a wide pan and fry carrots on medium heat for 3/4 minutes.

4. Add in garlic and continue to fry till aromatic, careful not to burn.

5. Add the beef to the pan and brown all sides. Try not to crowd the pan otherwise you’ll end up boiling the meat not frying it. Do it in batches if too much in onw go.

6. Transfer the pan to a slow cooker.

7. To the slow cooker add in tomato puree, red wine, onion, parsnip, bouquet garni and beef stock. The total liquid should cover the all the beef and veg.

8. Slow cooker for at least 2 hours but for max tenderness over night for 8 hours.

9. When 30 mins remain add in the peas and remove bouquet garni.

10. Finally, season with salt and pepper to taste.

NOTES
Additionally you can add in suet dumpling 20 mins before finished cooking time.
Can also be done in a pot rather than slow cooker.

Yaki Gyoza (Pork and Onion Gyoza)

Yields approx 25 Gyoza

INGREDIENTS
Main filling
120g Pork – Minced
100g Cabbage – finely chopped
50g Onion – finely chopped
50g Nira (Garlic Chives) – finely chopped.

Seasonings
1/2 TBSP Soy
1/2 TBSP Sugar
1 Pinch Pepper
1 TBSP Sake
1/2 TBSP Sesame Oil
1 TBSP Potato Starch (or Cornstarch)
1 TSP Garlic – Grated
1/2 TSP Ginger – Grated
1 TBSP Oyster Sauce

Skins
25 Gyoza Skins – You can make own but this is easier.
Flour for dusting.
1 TBSP Sesame Oil

INSTRUCTIONS
1. Mix pork in a large bowl till gooey – using your hands.

2. Add in all the seasonings (soy, sugar, pepper, sake, sesame oil, potato starch, garlic, ginger and oyster sauce). And kneed well into the pork.

3. Add the cabbage, onion and nira and mix through gently.

4. Cover bowl with cling film and sit in fridge for 30 mins to marinate the juices.

5. While waiting, dust flour onto a baking sheet.

6. Once pork has marinated spoon out approx 1 TBSP onto a gyoza skin. Wet the out part of the skin to help it seal.

7. Pull one side of skin over to the other to produce a semi circle and begin to gather one side of the skin into pleats, sealing it well into the opposite side. Place completed gyoza on the floured baking sheet.

8. Heat sesame oil in a large lidded pan on medium heat.

9. When hot enough place half the gyoza in the pan, make sure not to crowd the pan too much.

10. Pour in boiling water till it covers half way up the gyoza and place lid.

11. Steam for approx 5/6 mins or until the water has mostly evaporated.

12. When the water has evaporated, drizzle sesame oil between the gyozas in the pan and replace the lid.

13. Cook for another 2/3 mins until they sizzle.

14. Serve them crispy side up.

NOTES
This recipe goes great with Gyoza Dipping Sauce!

Gyoza Dipping Sauce - Anonymous Cookery 2014
Gyoza Dipping Sauce – Anonymous Cookery 2014

Spaghetti with Garlic Butter, Bacon and Prawns

serves 2

INGREDIENTS
45g Butter
3 Cloves Garlic
3 TBSP Lemon Juice
1/4 Cup Basil – Chopped
250g Spaghetti
1/2 TBSP Olive Oil
4 Bacon Rashers or Lardons – Chopped
250g Prawns – or if using large prawn prep 5 each.

INSTRUCTIONS
1. Mash together the garlic, butter, lemon juice and basil in bowl and set aside.

2. Heat oil in pan and fry bacon till crisp and remove from pan and set aside.

3. Cook pasta in salted water.

4. Put pan back on heat and add half garlic butter

5. Fry prawns for a few minutes in garlic sauce.

6. Drain pasta and place in pan with prawns

7. Add bacon to pan with remaining garlic butter and toss to coat.

NOTES
Add more lemon juice to taste. You can also substitute the Spaghetti for Tagliatelle. Serves with a crusty bread slice to soak up the garlicy lemony juices. Nnnng.

This is based on the awesome recipe here http://www.taste.com.au/recipes/20860/spaghetti+with+garlic+butter+bacon+and+prawns